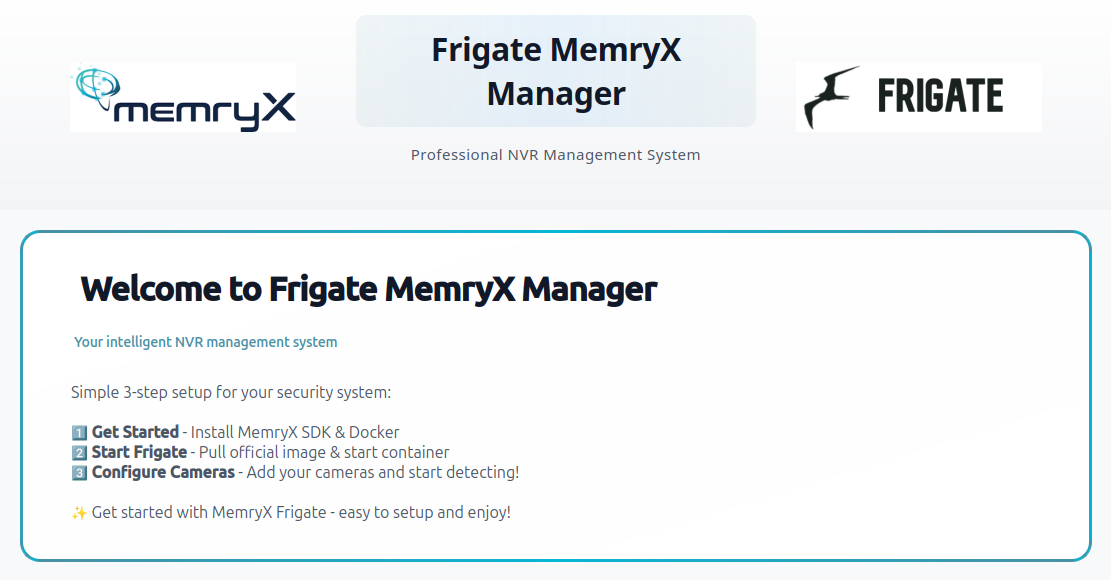
MemryX Frigate Manager
A simple installer + launcher that handles Docker, MemryX SDK, Frigate, and dependencies.
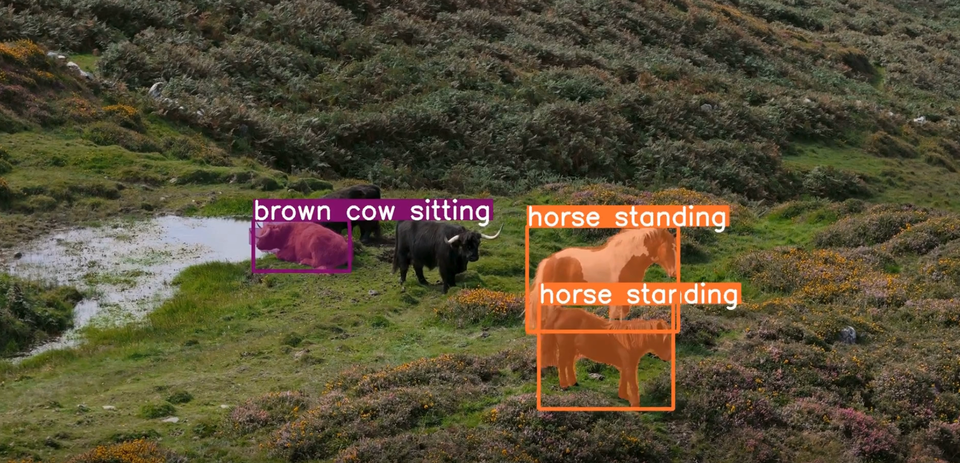
MemryX is integrated into Frigate, the most popular open-source home surveillance system, to accelerate real-time object detection using the MX3 AI accelerator. With MemryX handling inference, Frigate can run efficient on-device AI detection and scale to many concurrent camera streams without requiring a beefy GPU.
Requirements
You only need Python 3.9 to 3.12 on an Ubuntu or Debian based Linux distro to start!
The GUI will automatically install and set up:
- Docker + Docker Compose
- MemryX SDK
- Frigate Image
- All required dependencies
Get Started
Clone the memryx-frigate-manager repository.
git clone https://github.com/memryx/memryx-frigate-manager.git
cd memryx-frigate-manager
Run the application
chmod +x launch.sh
./launch.sh
That’s it — the GUI will guide you through the rest!
Main Screen Overview
Once the application launches, you’ll see the main screen.
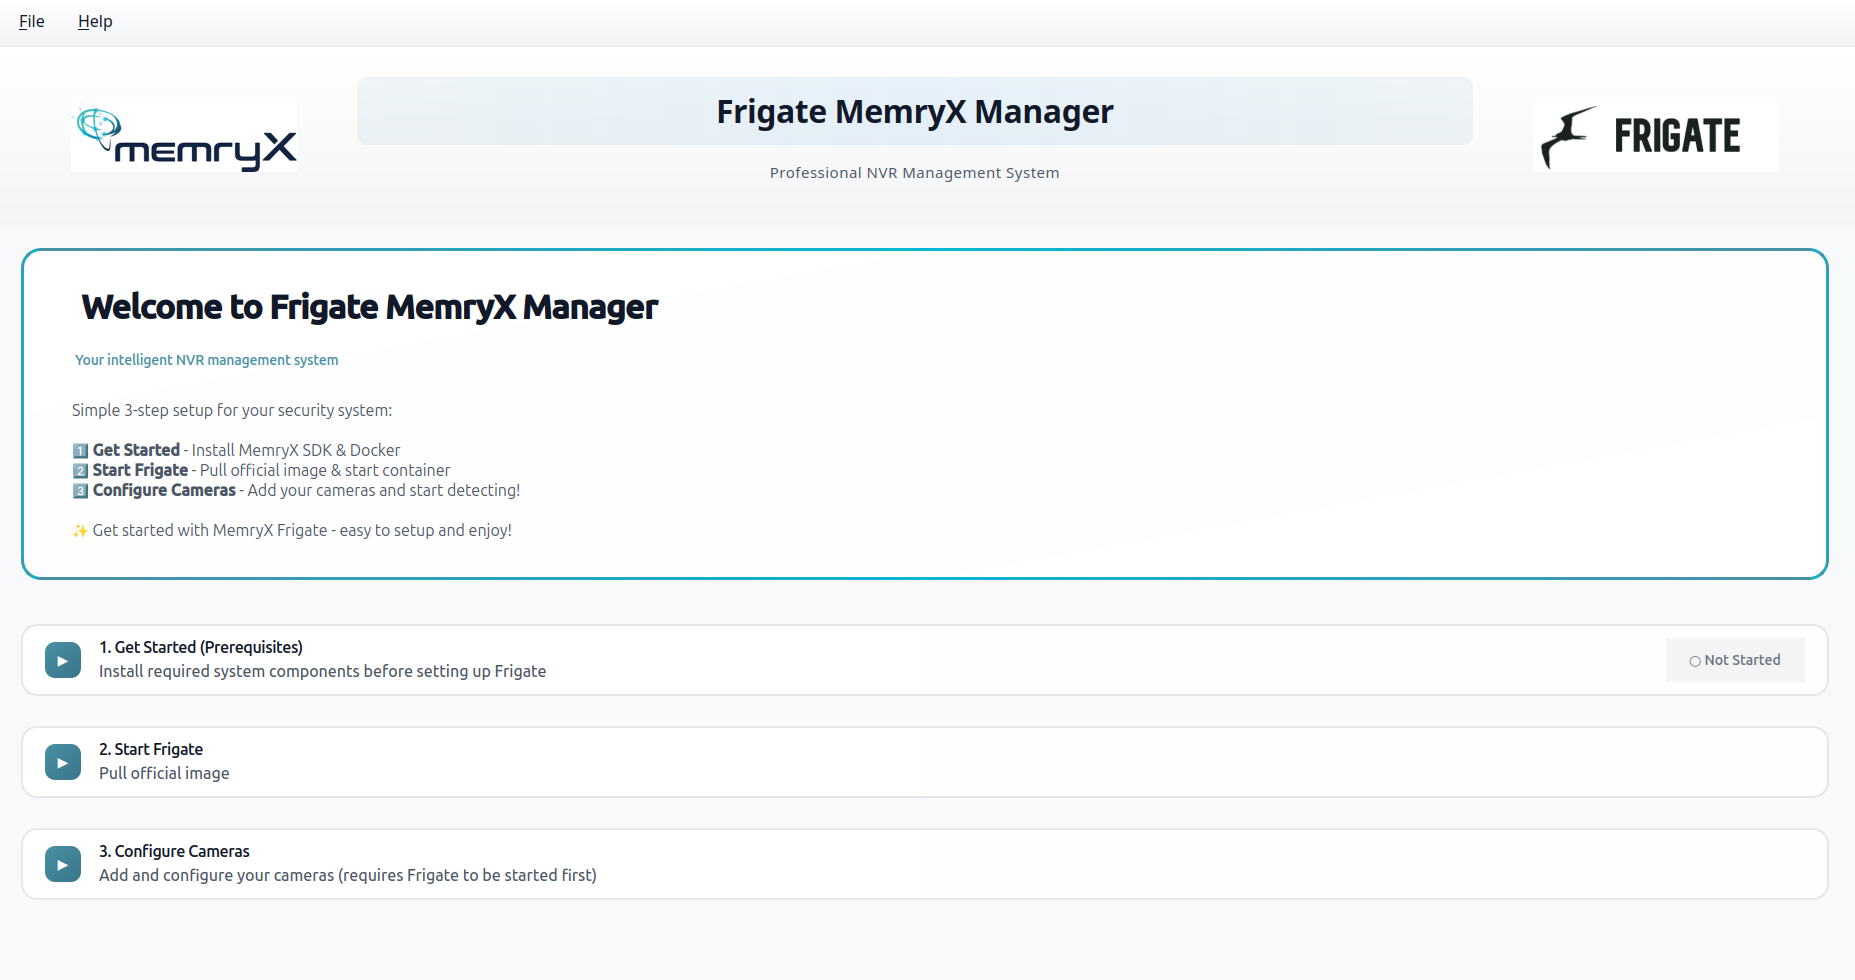
The setup is broken into 3 simple steps, so you always know what to do next.
Step 1: Get Started (Prerequisites)
The first step is Get Started, where the app takes care of the prerequisites for you.
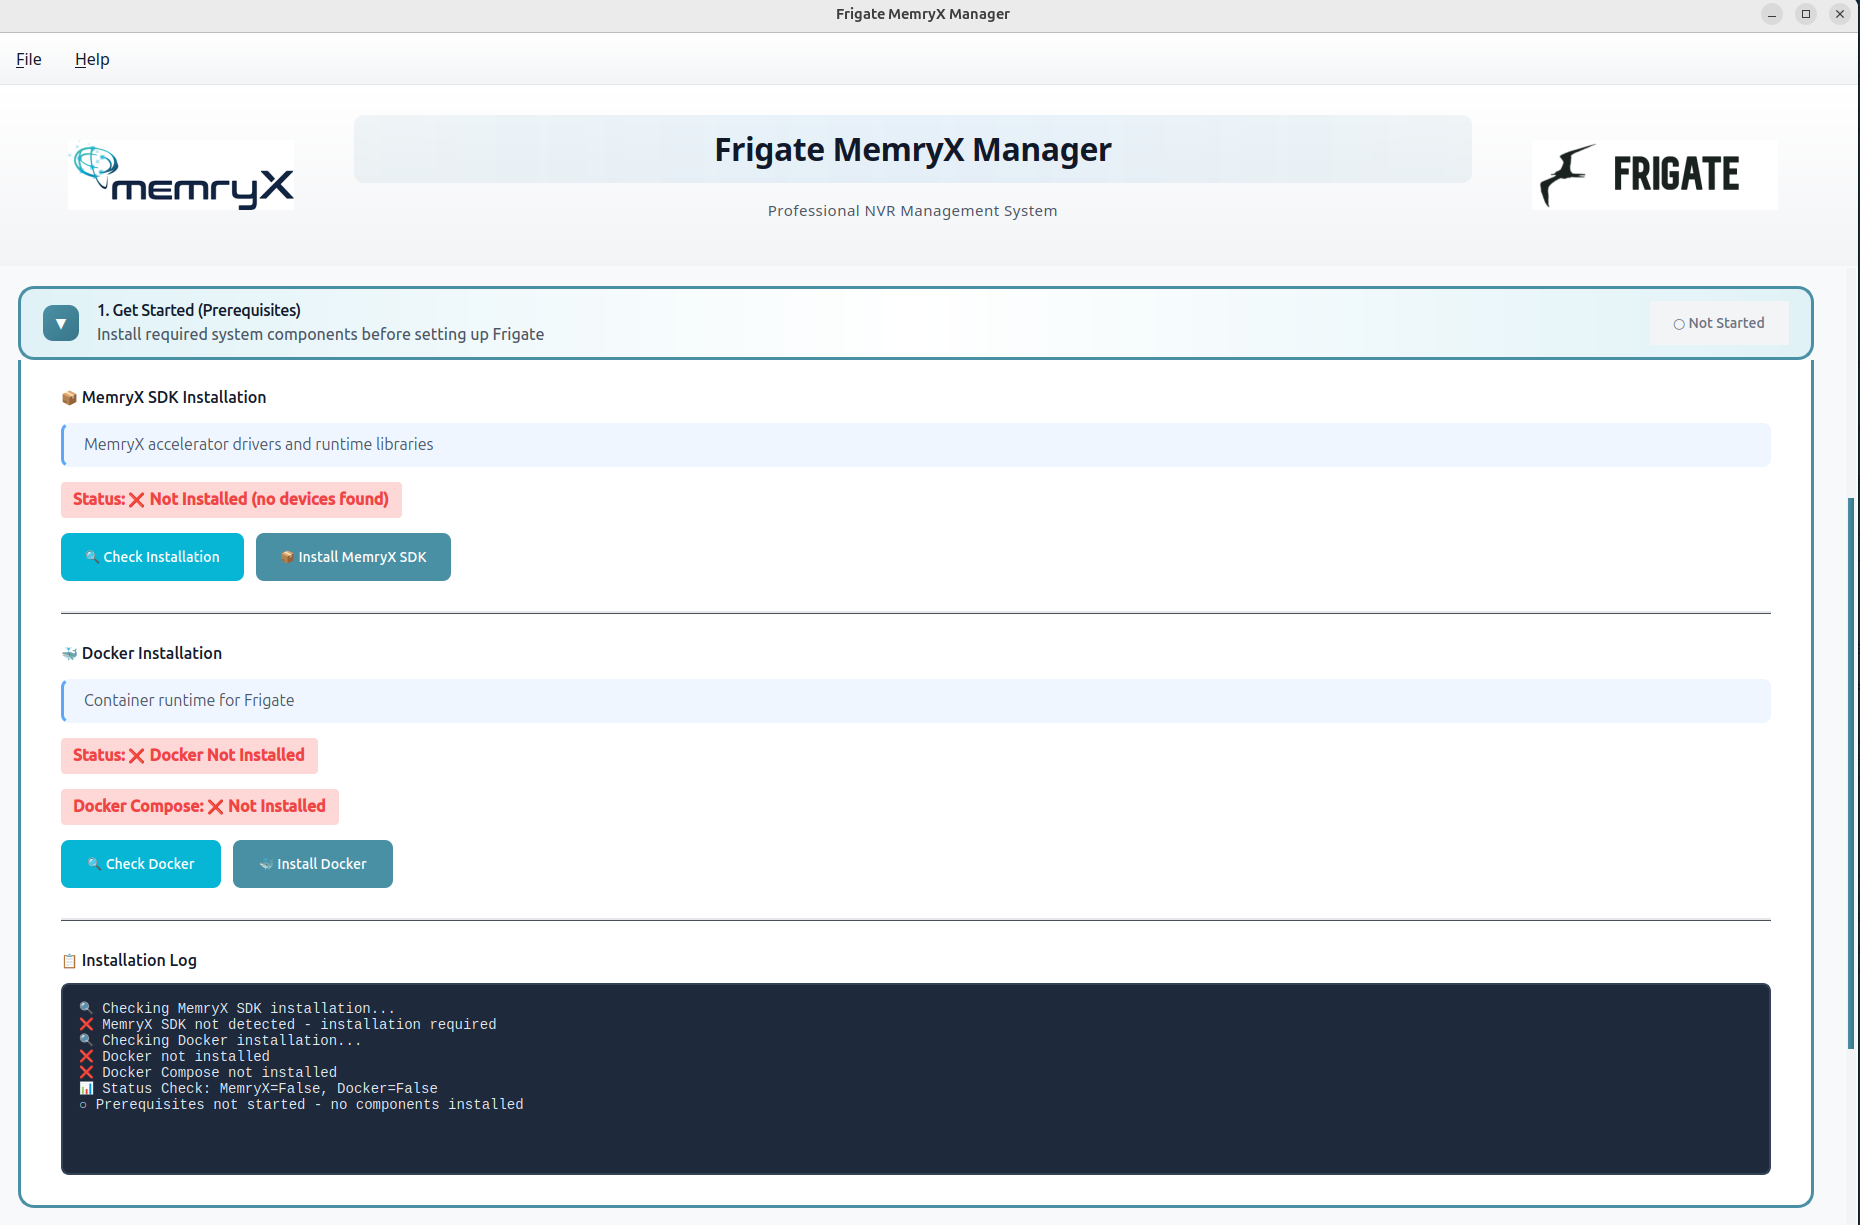
From here, you can simply click:
- Install MemryX SDK
- Install Docker
You can also view the logs directly in the GUI to track progress while everything installs automatically in the background.
(Please wait for the current operation to complete before clicking the next button.)
Step 2: Start Frigate (Pull stable image & Run)
Click Start Frigate to automatically pull the official stable image: ghcr.io/blakeblackshear/frigate:stable

This stable image already includes MemryX package, so no additional installation or manual setup is required. Once the image is pulled, the Frigate container will start automatically.
Next Steps
After Frigate is running: proceed to Step 3 to configure your cameras and models.
- Add your camera(s) to the configuration.
- Select the desired detection model(s).
- Restart Frigate to apply the new configuration.
⚠️ By default, no cameras are configured, so detections will not begin until cameras are added.
Step 3: Configure Frigate
This step helps you set up your cameras and update the Frigate configuration file (config.yaml).
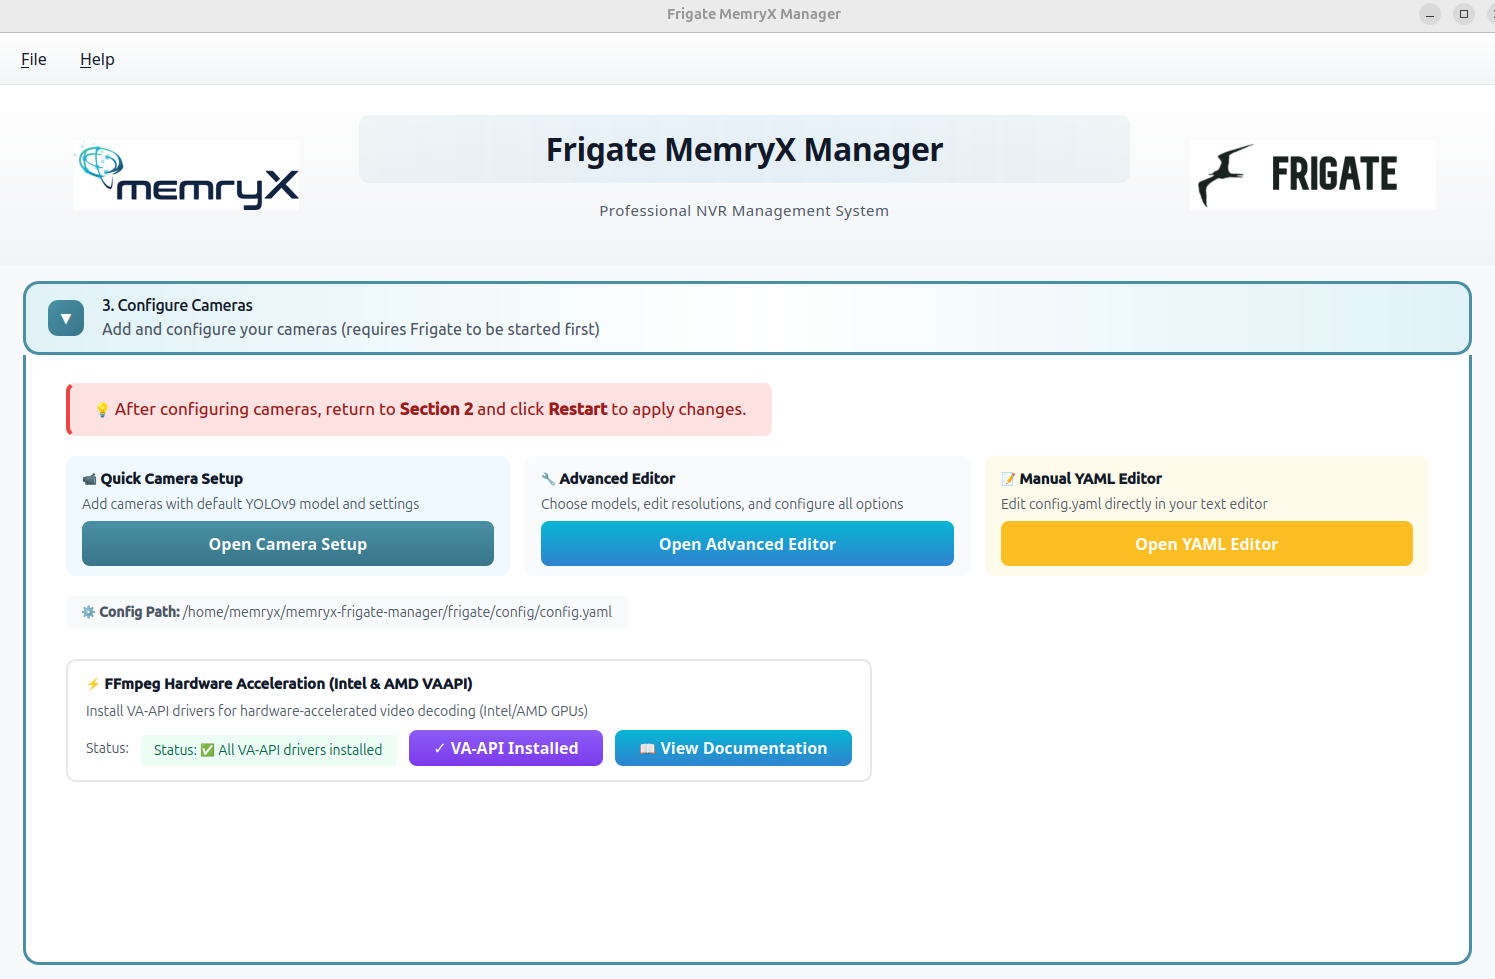
To make configuration flexible for different users, the GUI provides three editor options:
1) Open Camera Setup (Simple Mode)
This option uses the default model yolo-generic (YOLOv9) and focuses on quick camera setup.
- It’s a simple interface that helps you add cameras easily — you can add any number of cameras as shown below.
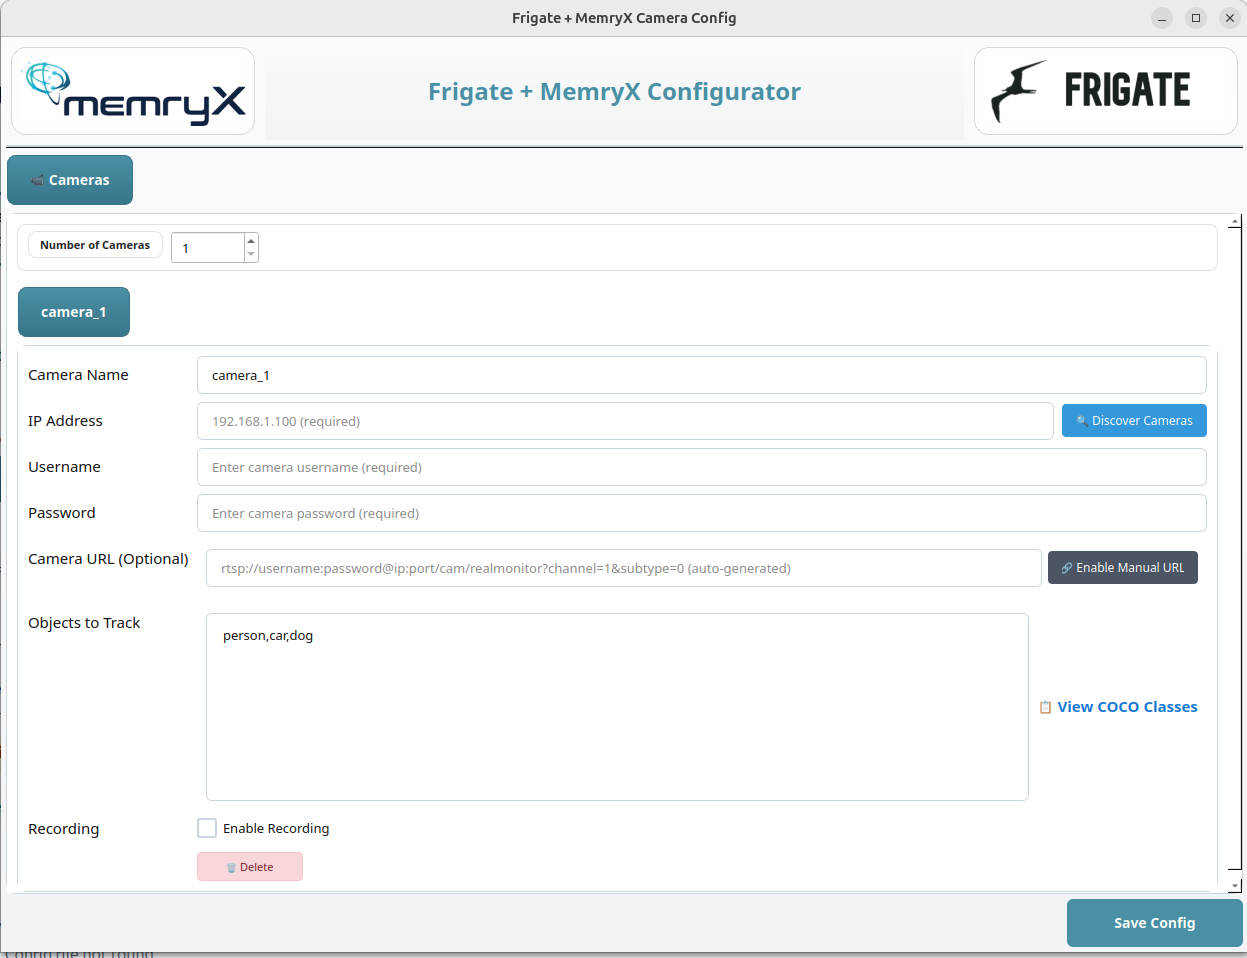
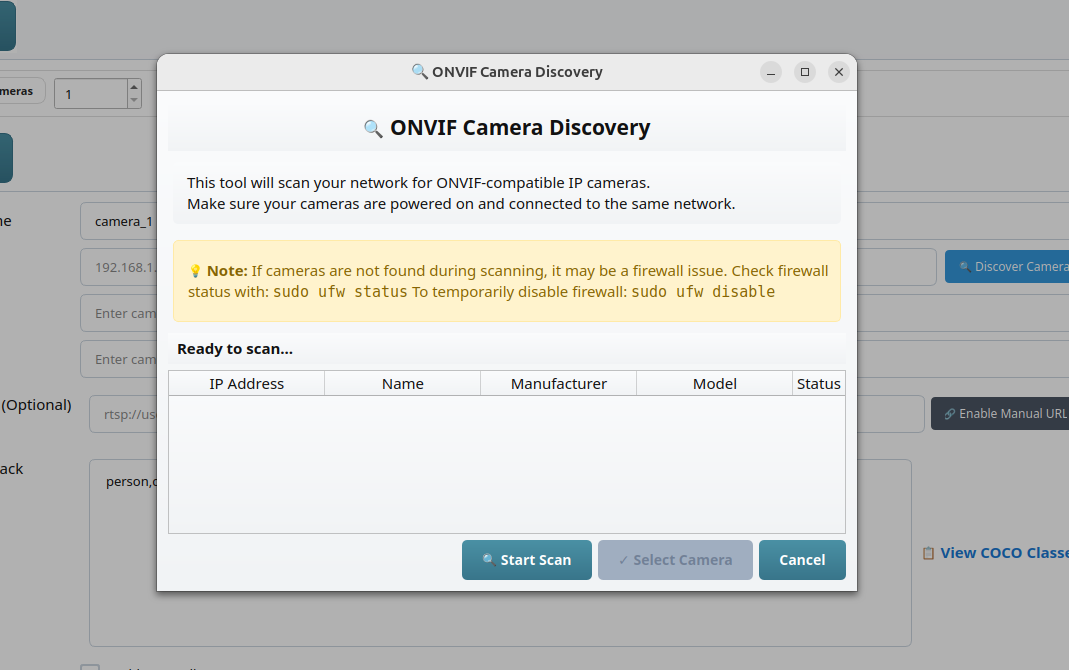
- You can also click Discover Camera, which uses ONVIF to scan for IP cameras on your network and makes it easier to connect without manual lookup.
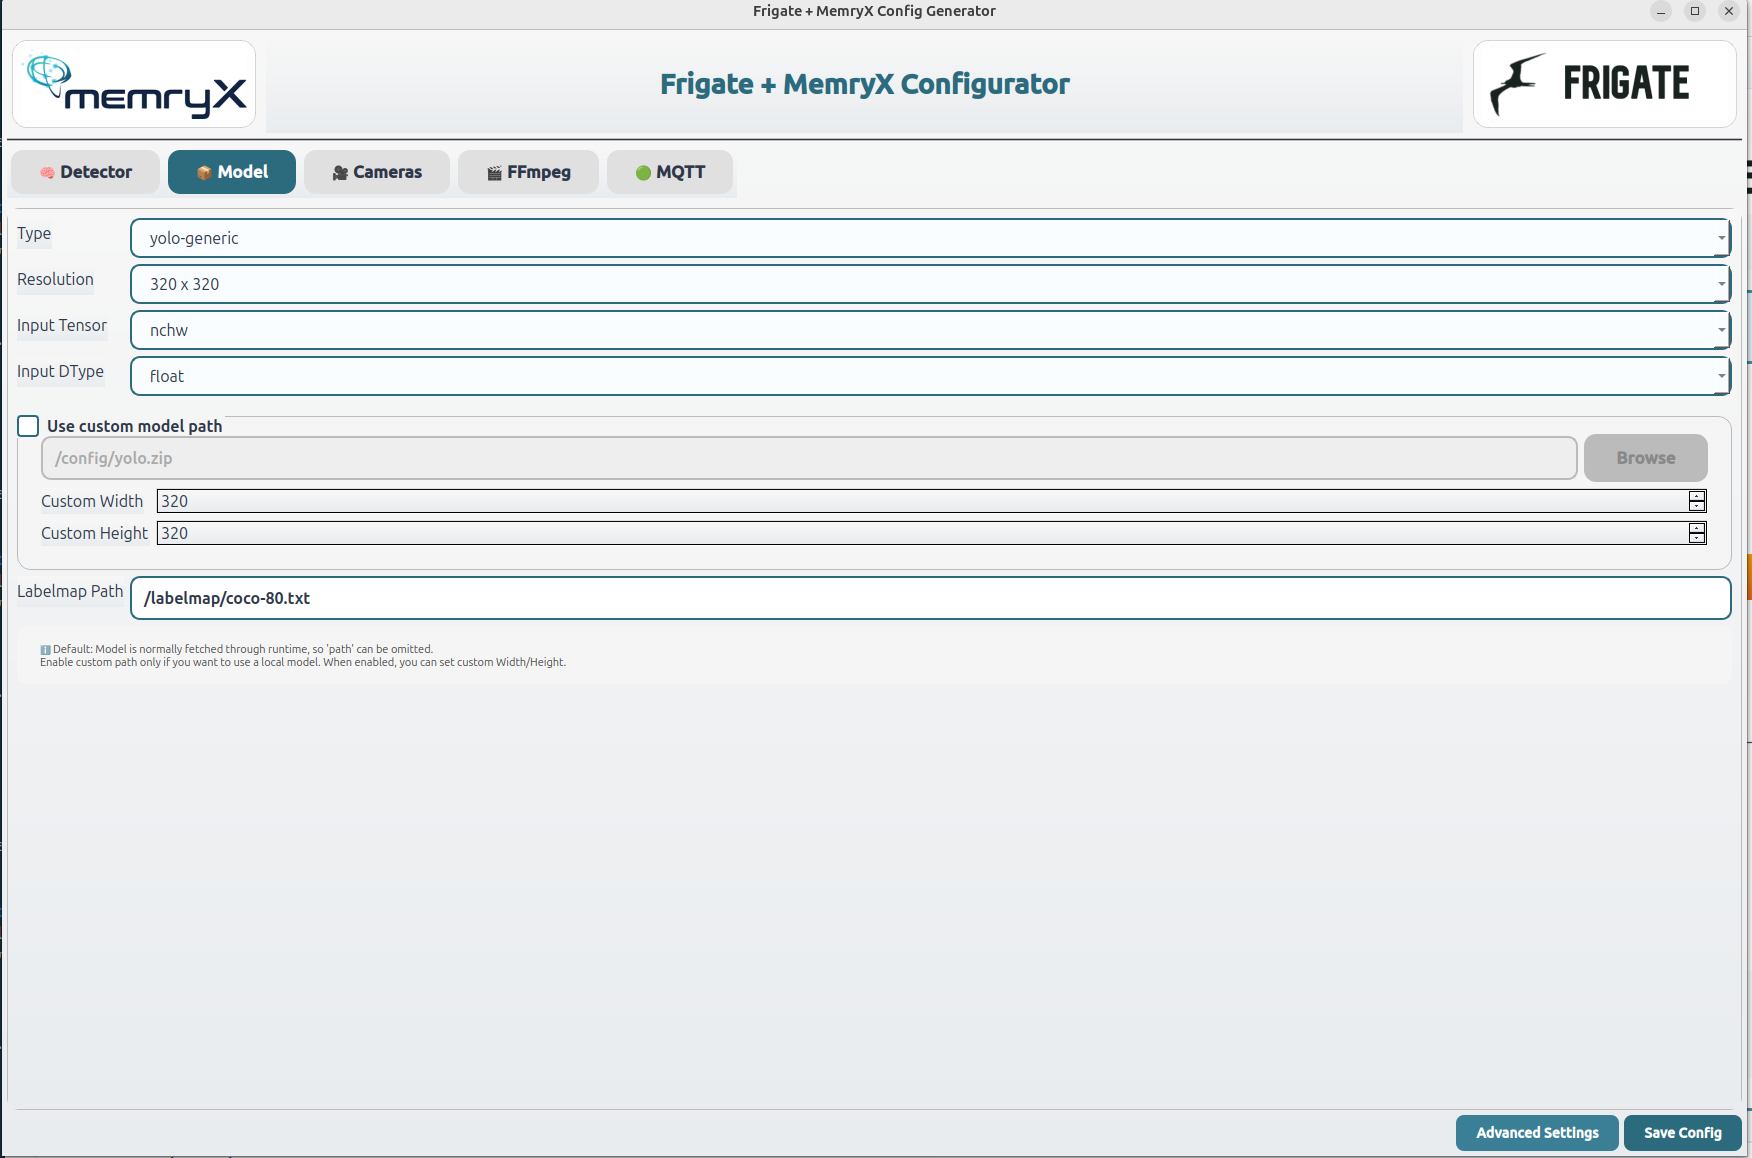
2) Open Advanced Editor
This opens a more advanced GUI where you can:
- Select different models (or provide a custom model)
- Change camera resolution
- Tune additional detection/configuration options
3) Open YAML Editor [Most Advanced]
- If you prefer full control, this option opens the Frigate config file directly so you can manually edit the YAML in your own editor.
FFmpeg Hardware Acceleration (Optional)
- At the bottom of this section, you’ll also find FFmpeg Hardware Acceleration settings.
- If you’re using an Intel or AMD system, you can click Install VA-API to enable hardware decoding for faster video processing and lower CPU usage.
Open Live View

When Frigate is up, click Live View — it will open your browser and take you directly to the Frigate dashboard. 🚀
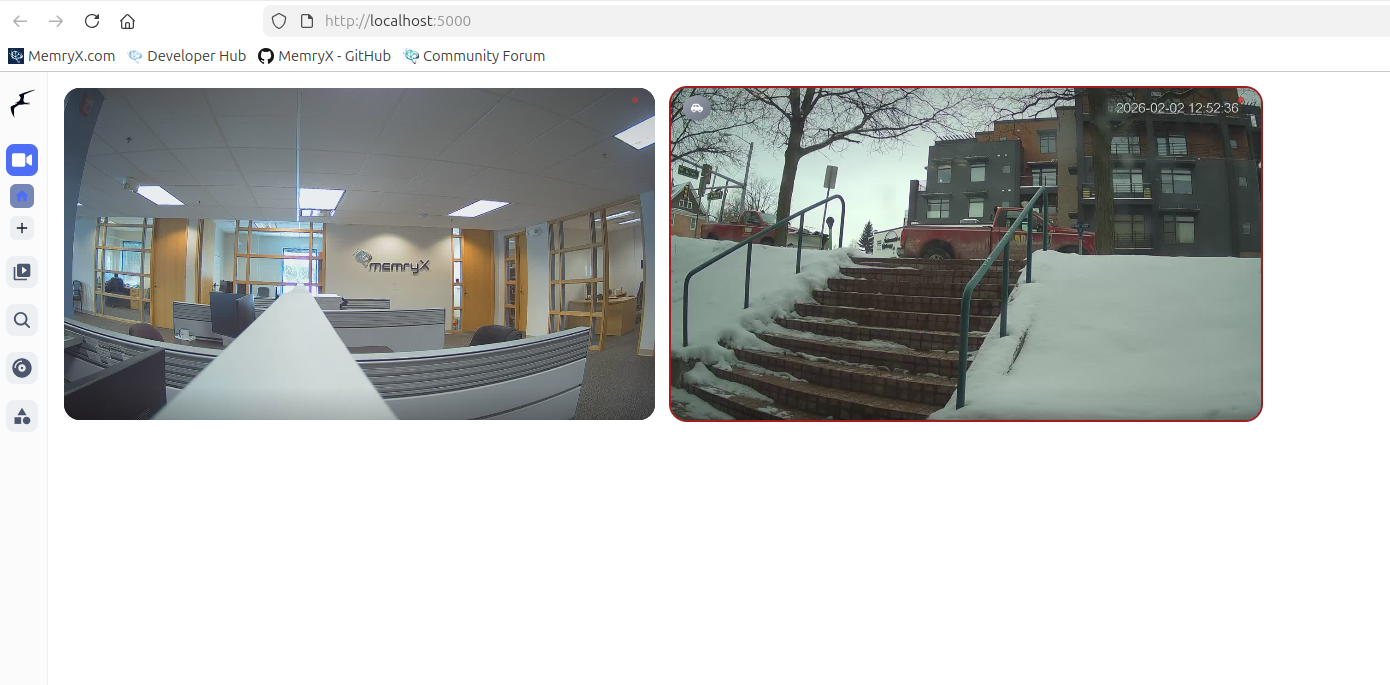
To view logs or troubleshoot errors, open http://localhost:5000/logs to see detailed log information.

Yay — you’re all set! 🥳
Once you’re in the Frigate web interface, you can head to Settings to configure zones, fine-tune detection, and explore more Frigate features.
Community Support and Discussion
Run into any issues? Have a good suggestion on how to improve? Check out our Frigate/NVR section on our Community forum!